DashTailor - Training Free Clothing and Object Transfer for AI Comics

While making comics using generative AI, achieving consistency in clothing and specific objects across panels is essential. It’s easier to do with characters and art style by using LoRAs. But it’s impractical to train a LoRA for clothing because using too many concept LoRAs together creates unwanted artefacts. A character might wear different outfits in different scenes, so generating the clothing as a part of the character by including it consistently in every image of the LoRA dataset isn’t practical either. We needed a method to upload an image of clothing or an object and transfer it seamlessly into the target image.
To solve this problem, we used an interesting capability of the Flux Fill inpainting model that transfers concepts from one part of an image to another part of the same image remarkably well. The workflow for this technique can be found here.
Approach
Masking: Draw masks on the object and target images
Object image – the mask covers the piece of clothing the character needs to wear
| Object image | Object mask |
|---|---|
Target image – the mask covers should cover only the part of the image where the object must be applied, such as the character’s body
| Target image | Target mask |
|---|---|
Extracting the Masked Object: Isolate the part of the object image within the mask, leaving the rest of the image blank. The original aspect ratio of the image was retained.
Using GPT-4o Vision: Describe the isolated object to use as a prompt. The GPT instruction prompt is: Describe the clothing, object, design or any other item in this image. Be brief and to the point. Avoid starting phrases like "This image contains...”
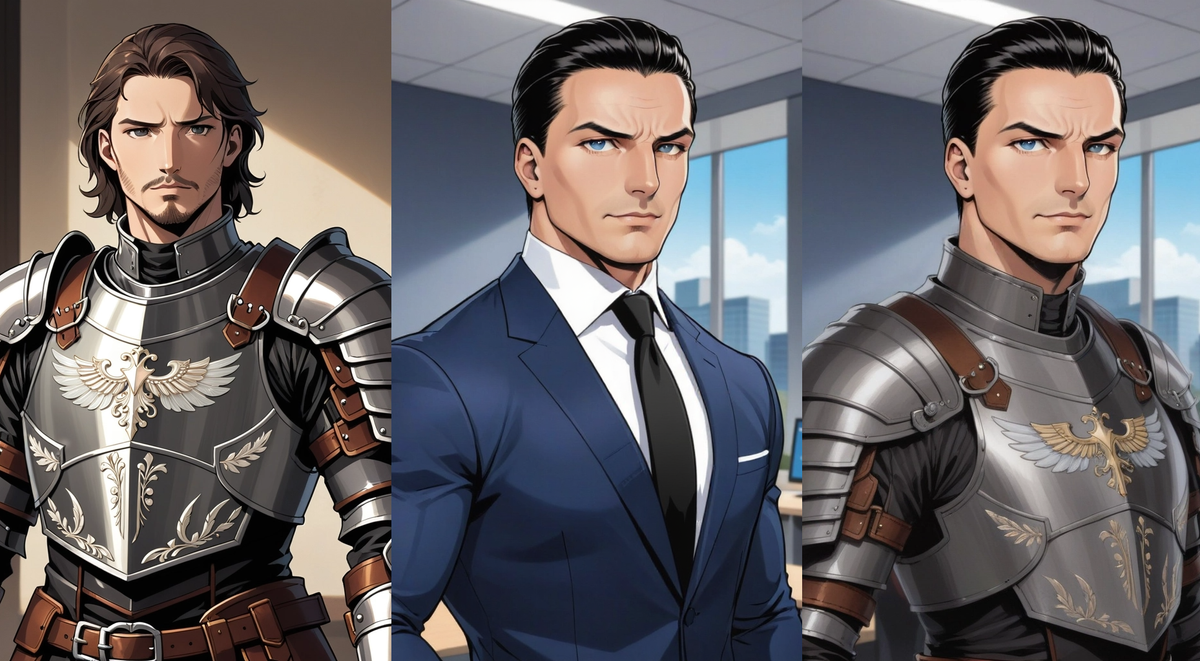
In this case the extracted object prompt was Metallic plate armor with intricate designs, including a winged emblem on the chest. Brown leather straps and accents secure the armor, complemented by layered pauldrons and arm guards.
Creating a Composite Image: Join the object image and the target image side by side. Scale the object image height up or down to match the target image.
Pose Controlnet: To maintain the pose of the original subject while inpainting, we passed the composite image into an Openpose annotator and used Flux Union Controlnet with type Openpose and strength value of 0.8.
Flux Fill Inpainting: Use the composite image along with the GPT extracted prompt as the conditioning to guide the inpainting process. The inpainting parameters are:
- Flux Guidance: 50
- Denoise: 1
- Steps: 20
- CFG: 1
- Sampler: Euler
- Scheduler: Beta
Cropping the composite image: Crop the output from the left by the width of the scaled object mask image to get the target image with the transferred output.
Improving quality: This output may still have some rough edges and artifacts. Also, there may be a style mismatch if the object image was in a different art style than the target image. So we recommend doing one final inpainting pass at 0.15 to 0.2 denoise and the same object prompt from earlier. It’s important that this inpainting pass uses the checkpoint, Lora, and generation configuration that’s suitable for the target image style. This will eliminate any artifacts and ensure style consistency. For example, if your target image is in anime style, use an anime checkpoint or Lora for this step.
Using Flux Redux: Optionally, you can use the Flux Redux model in the ComfyUI workflow instead of relying on GPT to write a prompt based on the masked object. To use Redux, change the value in this node in the Generation parameters section from 1 to 2. However, Redux is tricky to use. If your object and target masks do not perfectly match, black patches may be generated. For a general use case I would recommend using a prompt.
Why Does This Work?
When you combine the object and target images into a single composite image, you’re providing the model with a unified context. This allows the model to leverage the spatial and visual cues from both images simultaneously. Flux Fill is excellent at inpainting because its architecture utilizes the context of the image very well.
When both the object and the target areas are present in the same composite image, the model can more effectively learn the relationship and ensure the masked area is filled in a way that aligns with the object’s characteristics and the overall scene. The model’s attention mechanism can more easily correlate the visual features of the object with the masked area. This ensures a more precise and accurate transfer, effectively guiding the model to fill in the missing parts with high fidelity.
This method effectively transfers the isolated object into the target image, maintaining consistency across different poses and orientations.
How to use DashTailor
You can run this workflow in CommfyUI.
DashTailor is also available to use on dashtoon.com/studio. Just Create a new Dashtoon and use the tool in the Editor section.